Skip to content

Digital onboarding

A clearer start for every member.

Guide people through consent, document and selfie capture. Give your review team the evidence and context to decide what comes next.

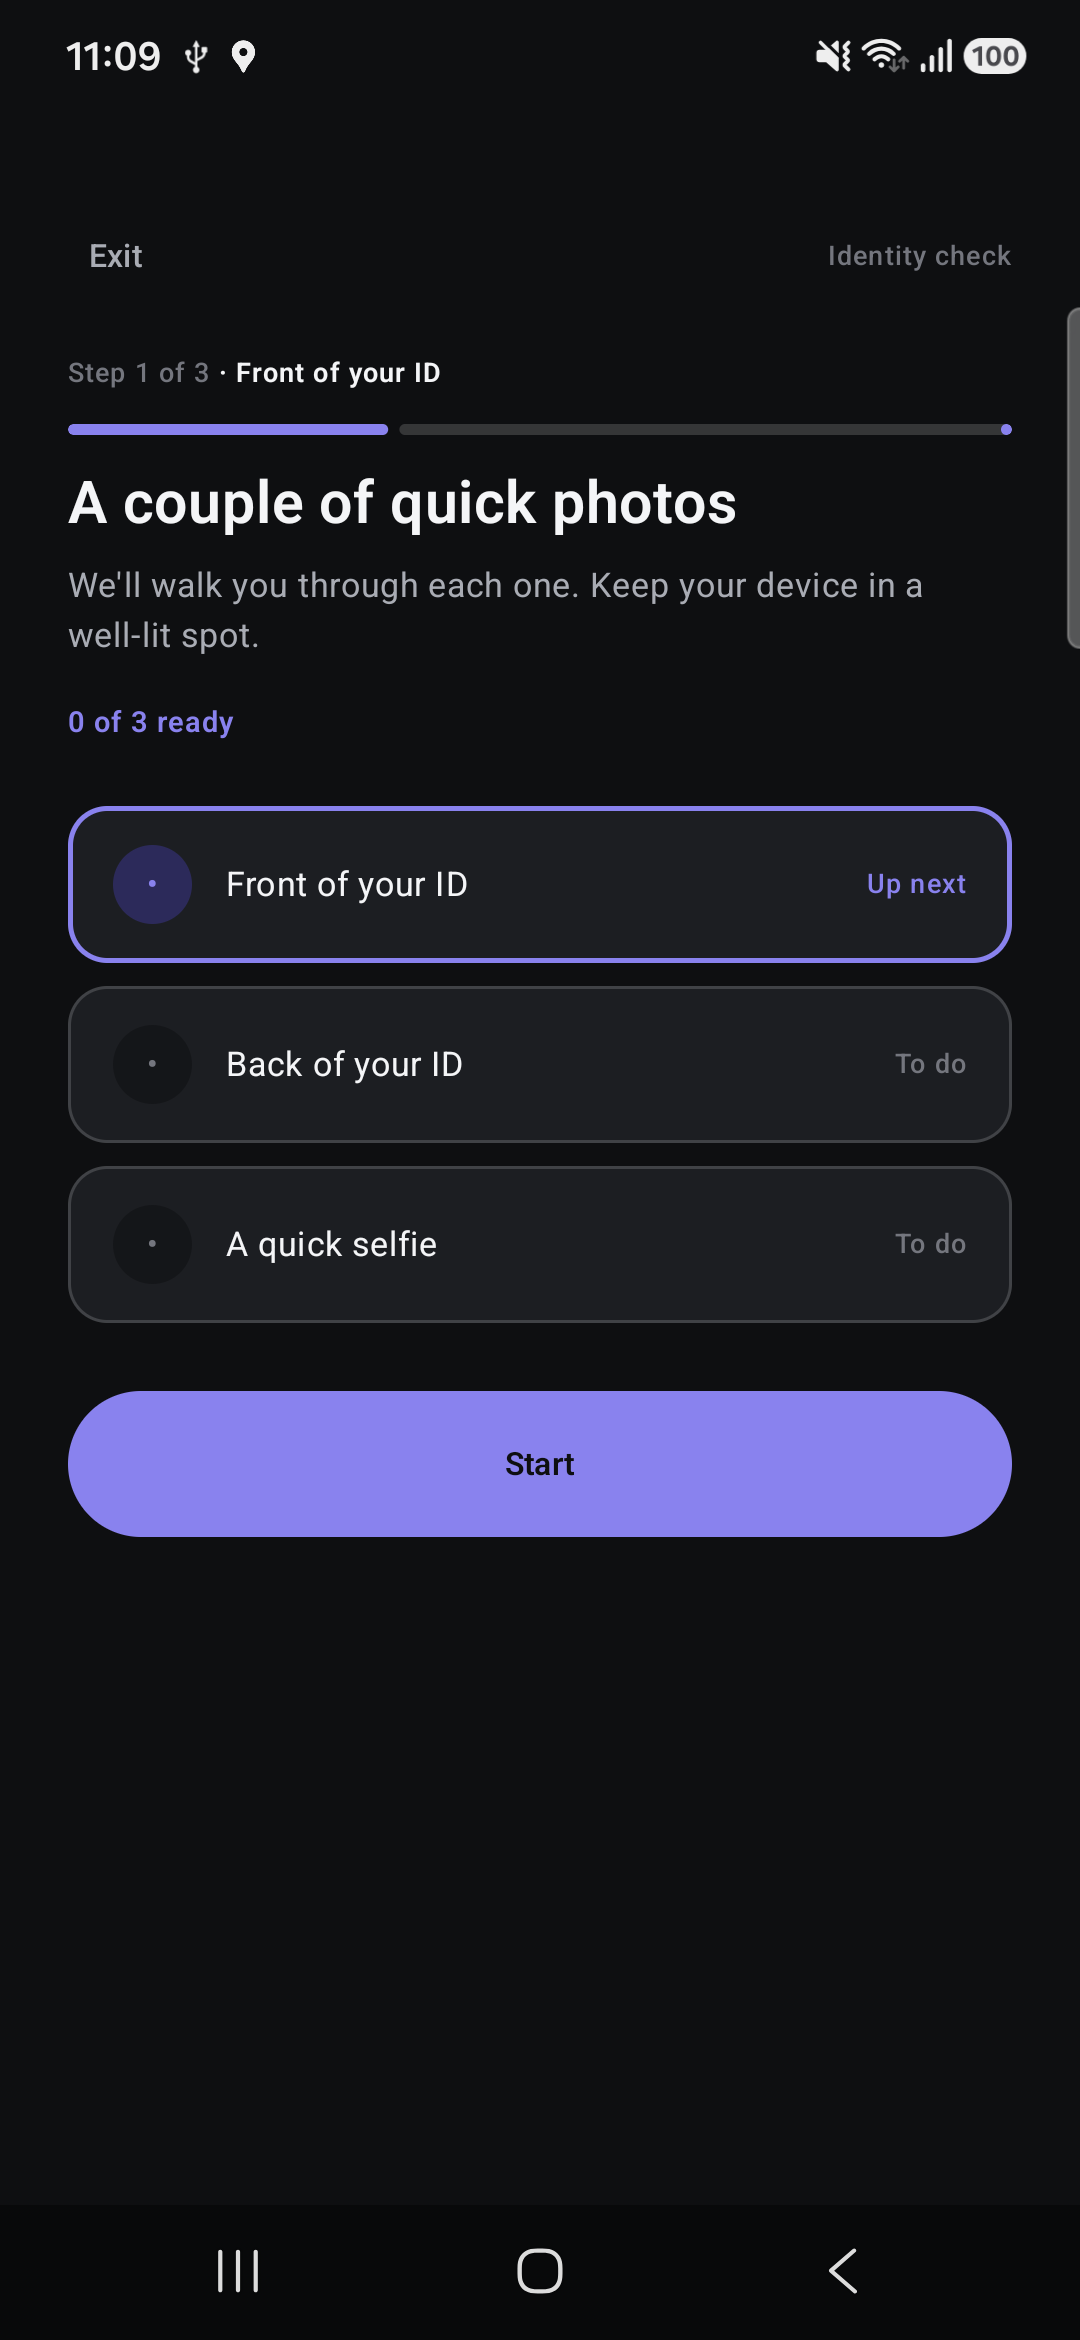
Onboarding checklist showing front of ID, back of ID and selfie steps before capture.

Guided from the start

Make each step understandable.

Document capture

Show members what to do next.

A clear prompt explains which side of the ID to photograph and how to position it before opening the camera.

  • Start with the front of the ID.
  • Keep all four corners in view.
  • Continue to the back and the configured selfie step.
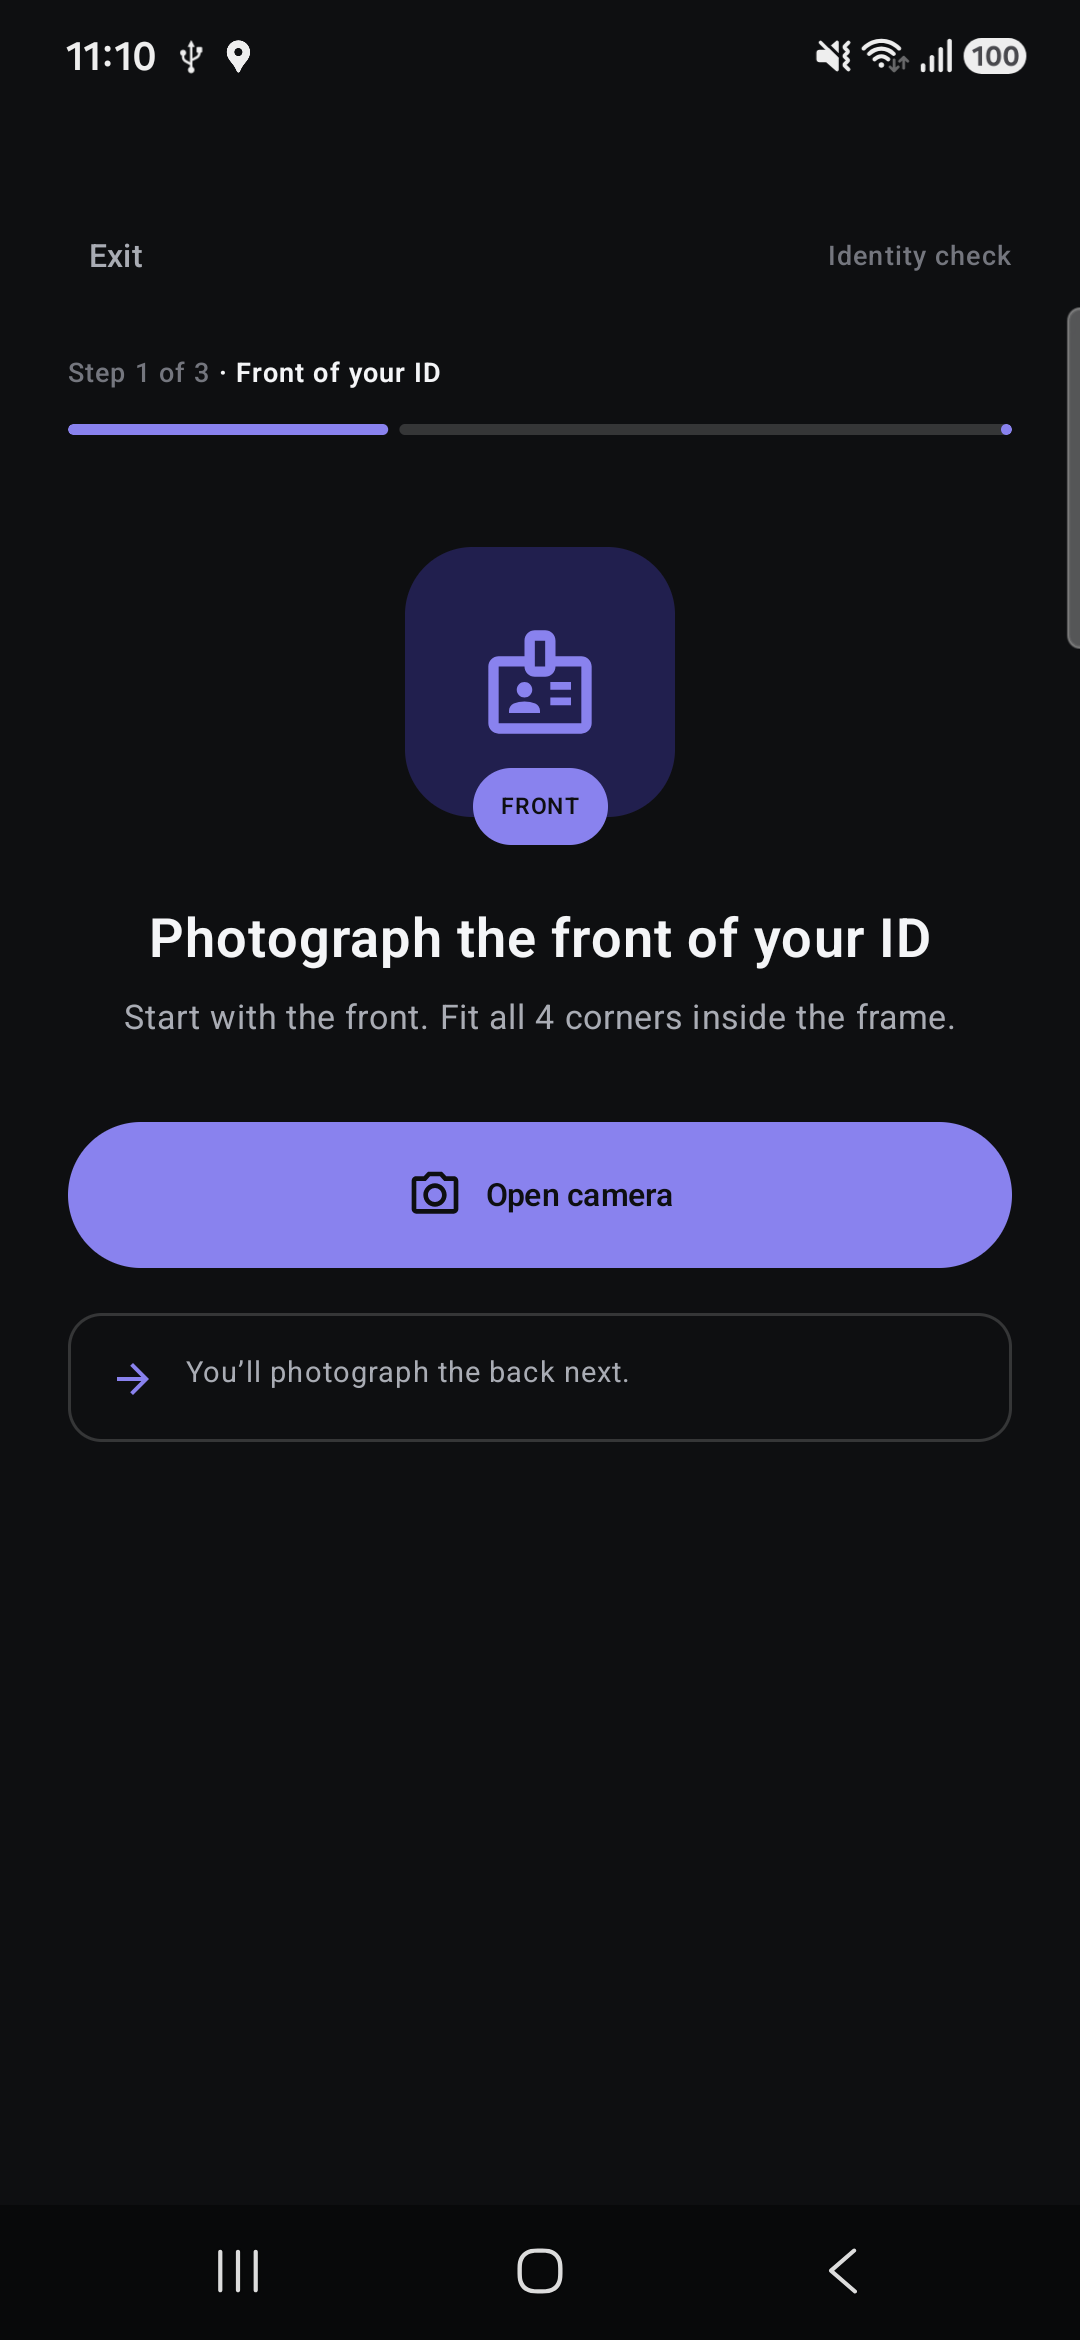
Guidance to photograph the front of an ID with all four corners inside the frame. No identity document is displayed.

Before submission

A clear handoff for review.

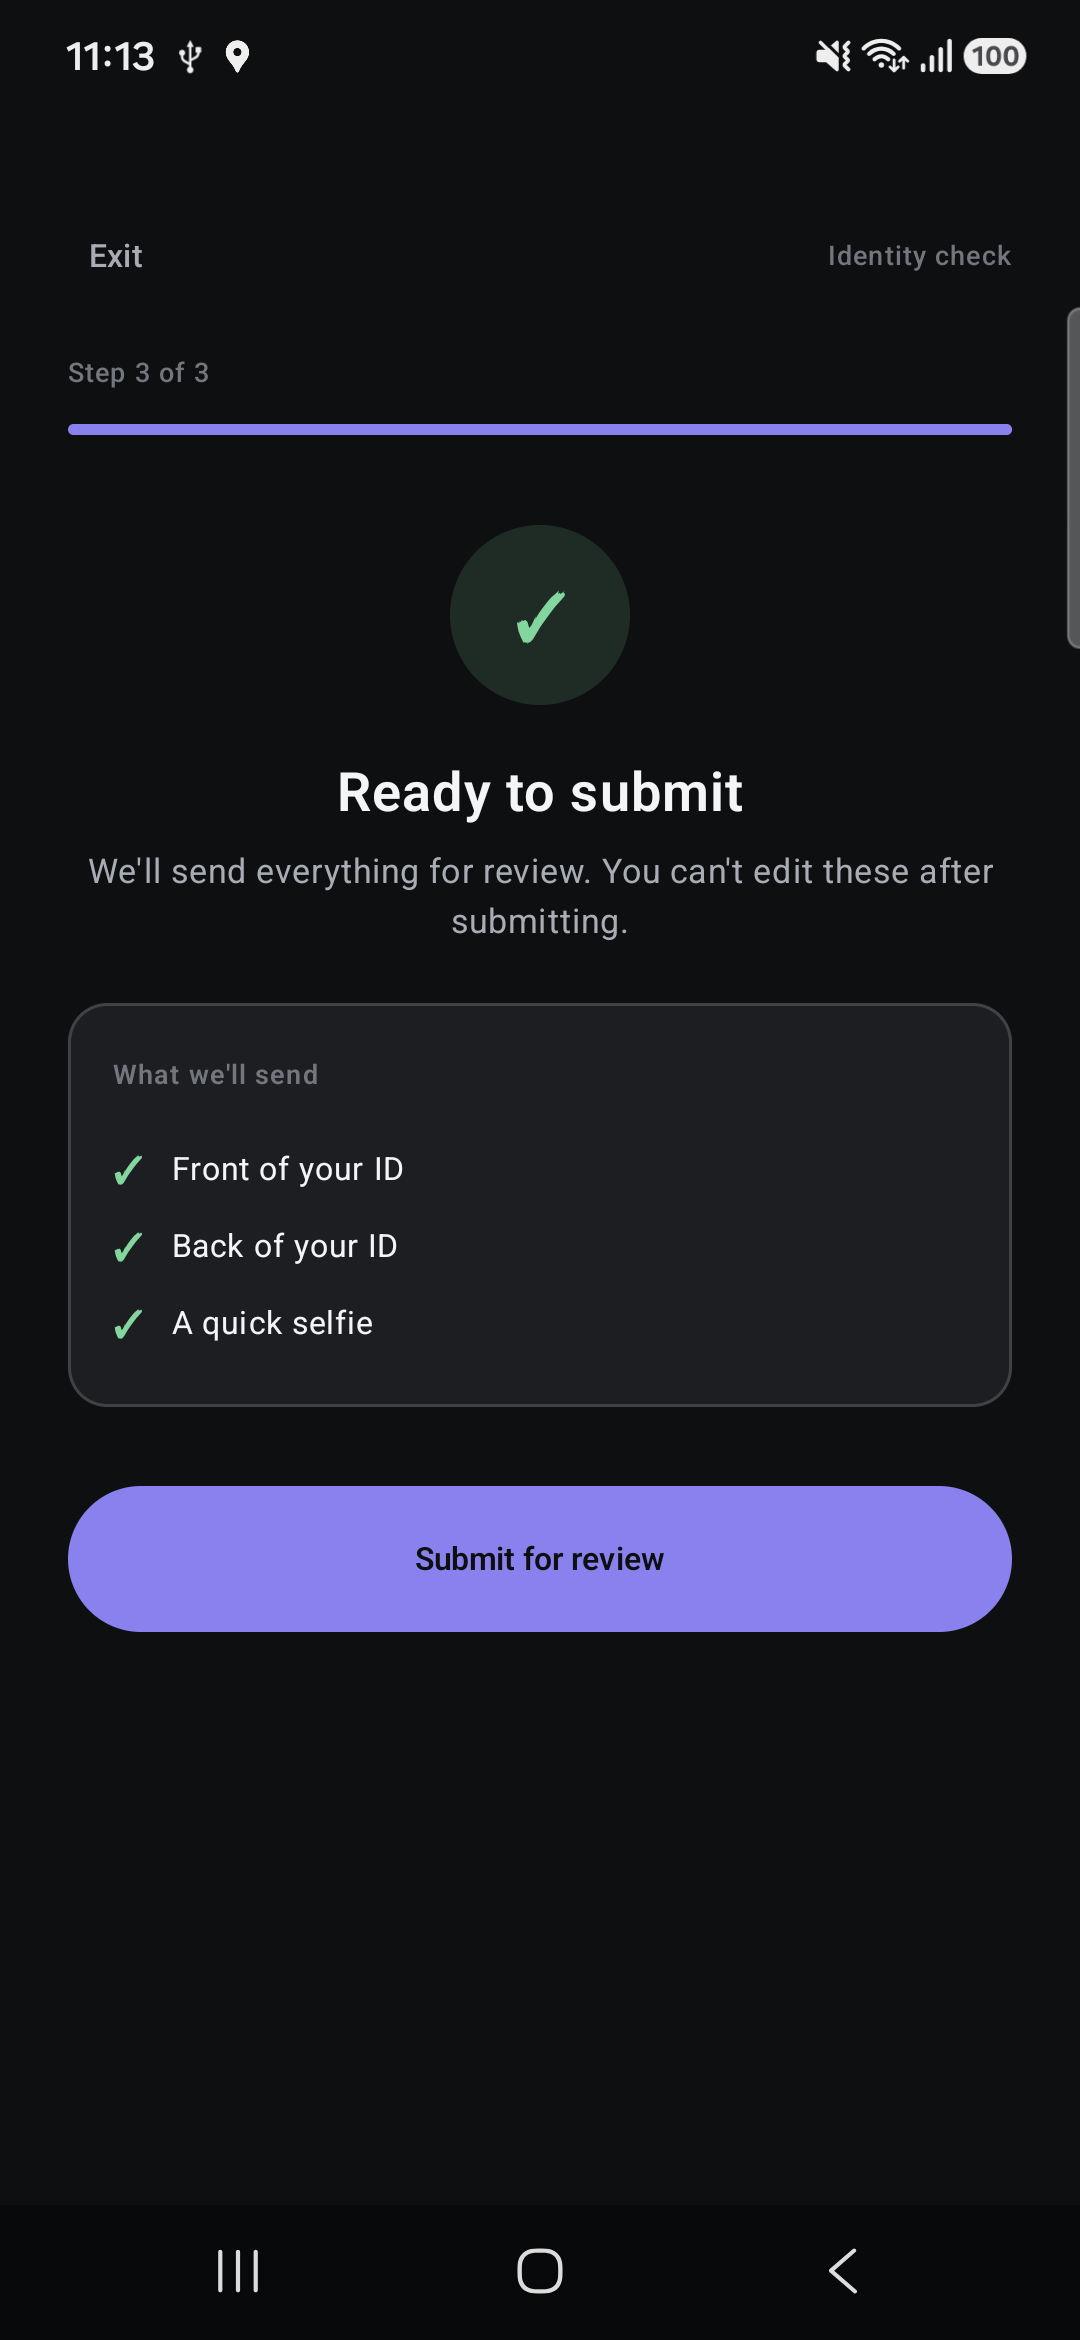
Members see what they are sending before submitting. The next step is review, with acceptance decisions kept with your institution.

Ready to submit screen listing the front of ID, back of ID and selfie to send for review, without showing personal evidence.

Let’s map your onboarding journey.

Agree the capture steps, available checks and review responsibilities for your institution.

Checks depend on the agreed profile and provider readiness. Your institution remains responsible for acceptance decisions, legal basis and required approvals.